
If you’re anything like me, you’ve fallen head over heels for the nostalgic charm of Polaroid cameras. There’s something magical about watching a tangible memory develop right before your eyes, right?
I’ve spent years experimenting with my collection of Polaroids, and I’ve learned a thing or two about making the most of these captivating cameras.

Mastering Polaroid settings is crucial for capturing the perfect picture.
Trust me, once you’ve optimized your Polaroid camera settings, you’ll be amazed at how much difference it makes in your photographs. But don’t worry, I’m here to share all the knowledge I’ve gathered over the years so you can quickly learn how to snap stunning Polaroid pictures too.
Read next: Polaroid Photo Size Guide: How Big Is A Polaroid Picture?
In this article, I’ll dive into the world of Polaroid settings, exploring how they can elevate your instant photography game. I’ll cover everything from outdoor and indoor shots to nighttime photography.
So, grab your favorite Polaroid, and let’s get started on this exciting journey together!
Polaroid Camera Settings Explained: Unlock the Magic of Instant Photography!
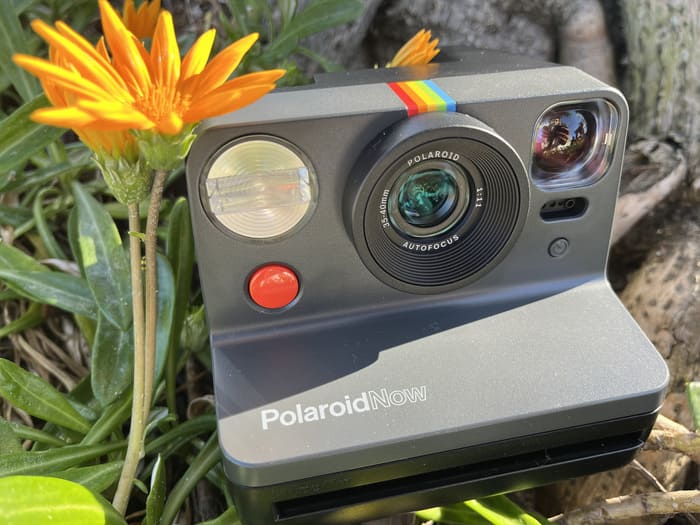
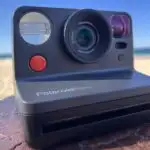
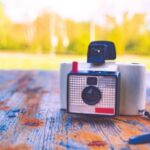
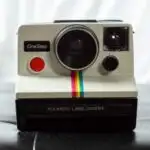
Let’s start with the basics: understanding your Polaroid’s camera settings. Most Polaroid cameras have a few primary settings, such as a light/dark slider, a built-in flash, and sometimes a close-up or landscape mode. Familiarizing yourself with these settings is critical to taking great photos.
The light/dark slider allows you to control the exposure of your photos. Moving the slider toward light will produce brighter images while moving it toward dark will produce darker images.
It’s crucial to find the right balance for your current lighting situation.

The built-in flash can be your best friend or your worst enemy, depending on how you use it.
For well-lit environments, it’s often best to turn it off. However, flash can help illuminate your subject in low-light situations and improve image quality.
Some Polaroid cameras also come with a close-up or landscape mode. Switching between these modes adjusts the camera’s focus to capture either detailed close-ups or sweeping landscapes with a sharp focus.
3 Reasons Why Polaroid Settings Impact Photo Quality
Understanding and using the correct settings on your Polaroid camera will significantly impact the final photo quality. Here’s how:
- Exposure: Proper exposure ensures your photos aren’t too dark or light. Finding the right balance will bring out the colors and details in your images.
- Focus: Selecting the appropriate focus mode for your subject ensures sharp, crisp images, whether you’re capturing close-ups or landscapes.
- Flash: Knowing when to use your camera’s flash can make a huge difference in your images, as it can help illuminate subjects in low-light conditions or avoid harsh shadows in well-lit environments.
By mastering these settings, you’ll be well on your way to consistently capturing high-quality, eye-catching Polaroid photos.
Polaroid Settings for Outside


Ah, the great outdoors!
There’s nothing quite like snapping a Polaroid amid nature’s beauty. But, as lovely as outdoor photography can be, it comes with challenges.
Don’t worry, though – I’ve got some tips to help you capture those picture-perfect moments outside.
- Find the right light: The best time for outdoor Polaroid photography is during the golden hour – immediately after sunrise or right before sunset when the sunlight is soft, warm, and simply gorgeous.
- Please pay attention to shadows: Be mindful of where the sun is and how it casts shadows on your subject. Avoid harsh, unflattering shadows by positioning yourself and your subject accordingly.
- Embrace the weather: Sometimes, overcast days can be ideal for Polaroid photography, as the clouds act like a natural diffuser, creating soft, even lighting.
Recommended Settings For Different Lighting Conditions
Now that we’ve covered some general tips for outdoor photography let’s dive into the recommended settings for various lighting conditions.
- Bright sunlight: In strong sunlight, you’ll want to set your light/dark slider towards the darker end to avoid overexposure. Also, consider turning off the flash, as it’s likely unnecessary in such well-lit conditions.
- Overcast or cloudy: On cloudy days, you should slightly set the light/dark slider towards the lighter side to brighten up your photos. Depending on the cloud cover level, you may or may not need to use the flash.
- Golden hour: During the golden hour, you’ll generally want to keep the light/dark slider in the middle or slightly towards the lighter side to capture the soft, warm glow. In most cases, you won’t need to use the flash.
With these tips and settings in mind, you’ll be well-equipped to capture stunning outdoor Polaroid photos, no matter the lighting conditions!
Polaroid Settings for Inside
Indoor photography with your Polaroid can be tricky. Here are my favorite tips to help you get the most out of your indoor Polaroid adventures:
- Look for natural light: Take advantage of natural light sources, such as windows or open doors. Natural light can add depth and warmth to your photos, creating a more inviting atmosphere.
- Experiment with artificial light: If natural light isn’t an option, use different artificial light sources like lamps, fairy lights, or even candles. These can add interesting textures and ambiance to your photos.
- Mind your background: Pay attention to what’s in the environment of your shots. Cluttered or distracting backgrounds can take away from your subject. A simple, clean background can make your subject stand out and create a more visually appealing image.
Now, let’s talk about the ideal settings for different indoor environments:
- Well-lit spaces: In rooms with plenty of natural or artificial light, you should set your light/dark slider towards the middle or slightly darker. This will help you maintain a balanced exposure. You may not need to use the flash in these situations.
- Low-light environments: Slide the light/dark slider towards the lighter side for dimly lit spaces to brighten your image. In most cases, you’ll want to use the flash to illuminate your subject and avoid underexposure.
- Mixed lighting: In situations with a mix of natural and artificial light, you should experiment with the light/dark slider and flash to find the right balance. How the different light sources interact and adjust your settings accordingly.
Polaroid Settings for Night

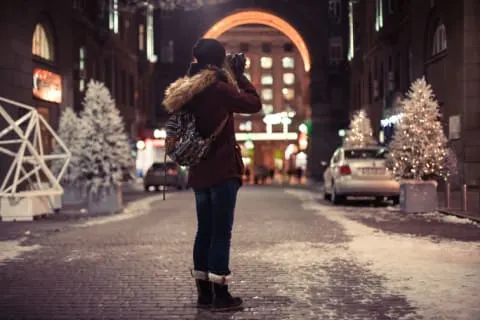
Night photography with a Polaroid camera can be both exciting and challenging. The low light conditions at night can make it difficult to capture sharp, well-exposed images.
But fear not, fellow instant camera enthusiasts! You can overcome these challenges with patience and a few handy tips and take stunning nighttime Polaroid photos.
Best Settings And Techniques For Night Photos
To make the most of your night photography sessions, keep these settings and techniques in mind:
- Maximize exposure: You’ll want to set the light/dark slider towards the lighter end in low-light conditions to allow for more exposure. This will help brighten up your images and capture more detail.
- Use the flash wisely: The built-in flash can be a valuable tool for nighttime Polaroid photography, but it’s essential to use it strategically. The flash can help illuminate your subject but also create harsh shadows or overexpose nearby objects. Experiment with the flash to find the perfect balance for your specific situation.
- Stabilize your camera: Camera shake is more noticeable in low light conditions, which can result in blurry images. Try stabilizing your camera using a tripod or resting it on a steady surface to combat this. This will help you achieve sharper, more focused night photos.
- Be patient: Night photography with a Polaroid camera can require a bit of trial and error, so keep going even if your first few shots turn out differently than you’d hoped. Keep experimenting with different settings and techniques; you’ll soon quickly capture those magical nighttime moments.
Frequently Asked Polaroid Settings Questions
Over the years, I’ve received hundreds of questions about Polaroid settings. I’ve answered the most common ones below:
What Are the Different Modes on a Polaroid Camera?

Polaroid cameras typically have several modes, including automatic, flash on/off, light/dark, and sometimes even double exposure or self-timer. These modes allow you to adjust your camera settings according to your needs and lighting conditions.
How Do I Take Better Pictures with My Polaroid?


To take better pictures with your Polaroid, pay attention to lighting conditions, adjust the light/dark slider and flash settings as needed, choose the correct focus mode, and experiment with composition and framing.
Additionally, keep your camera clean and well-maintained to ensure optimal performance.
What Setting Do I Put My Polaroid on Outside?

Adjust the light/dark slider for outdoor photography based on the lighting conditions. In bright sunlight, move the slider towards the darker end; on overcast days, slide it slightly towards the lighter side.
Generally, you won’t need to use the flash in well-lit outdoor settings.
What Setting Should My Polaroid Be on at Night?


Set the light/dark slider towards the lighter end at night for more exposure at night.
Use the built-in flash strategically to illuminate your subject without causing harsh shadows or overexposure. Stabilize your camera using a tripod or a steady surface to minimize camera shake and achieve sharper images.
Should You Put Polaroid in Dark vs Light?


Adjusting the light/dark slider on your Polaroid camera helps you control the exposure of your photos. If your images are too dark, slide them toward the lighter end; if they’re overexposed or too bright, move them toward the darker end.
Experiment with the slider to find the ideal exposure for your specific lighting conditions.
What Do the Plus and Minus Mean on a Polaroid Camera?
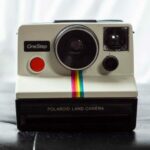
The plus and minus symbols on a Polaroid camera represent the light/dark slider settings. The plus (+) indicates a lighter setting, which will brighten your image, while the minus (-) indicates a darker setting, which will darken your image.
Adjust the slider according to your desired exposure and lighting conditions.
Do Polaroid Cameras Have Settings?


Yes, Polaroid cameras have settings that allow you to adjust various aspects of your photography, such as exposure, flash, focus mode, and sometimes self-timer or double exposure.
These settings help you capture images that match your creative vision and adapt to different lighting conditions.
Recap of the Importance of Polaroid Settings
And there you have it, fellow instant camera enthusiasts! Understanding and mastering Polaroid settings is crucial for capturing those picture-perfect moments.
You can elevate your Polaroid photography game by paying attention to lighting conditions, making the most of your camera’s modes, and experimenting with different settings.
Remember, practice makes perfect!
The more you play around with your Polaroid camera’s settings, the more you’ll learn about what works best for your unique photography style. So go out there, explore different settings, and don’t be frightened to make mistakes – that’s how we grow as photographers.
Most importantly, have fun capturing the world around you through the magical lens of your Polaroid camera. I can’t wait to see the stunning images you create!
Now, it’s time to take action. Grab your Polaroid camera, dive into the world of instant photography, and share your masterpieces with fellow instant camera lovers.
Read next: why is my polaroid flashing red?