
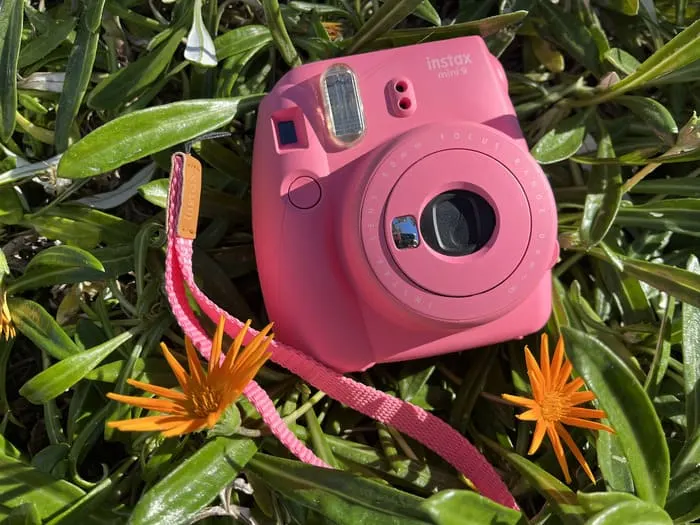
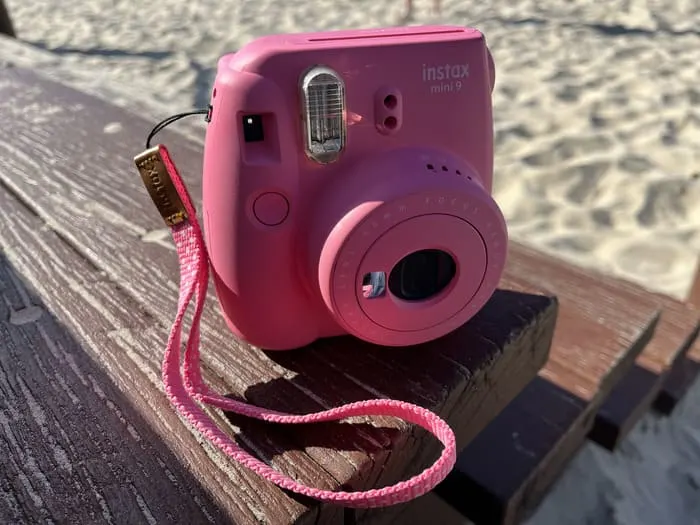
I adore my Instax Mini 9. It’s the perfect combination of retro charm and modern-day ease, making it a beloved camera for seasoned photographers and newbies.
In this article, I’m thrilled to share my Instax Mini 9 tips and tricks to help you make the most of your Instax Mini 9 experience.

Whether you’ve been using Instax cameras for years or just unwrapped your brand-new Mini 9, I aim to provide engaging, easy-to-understand, and helpful advice from my experiences.
Together, we’ll explore everything from essential camera features to creative hacks that can elevate your instant photography game.
So, grab your Instax Mini 9, and let’s embark on this exciting journey of capturing and cherishing those one-of-a-kind moments!
How To Take Good Pictures With Instax Mini 9?


Here are my 12 favorite tips for how to take good pictures with your Instax Mini 9:
- Make the most of natural light: To capture stunning photos with your Instax Mini 9, always use natural light to your advantage. Position your subjects near windows or head outdoors to bask in that beautiful, soft sunlight that will give your pictures warmth and dimension.
- Master indoor lighting: When taking photos indoors, avoid harsh overhead lights. Opt for lamps or diffused light sources that create a cozy and gentle atmosphere in your photos. Using a diffuser or strategically placing lamps will help you achieve that perfectly lit shot.
- Harness the power of the built-in flash: In low-light situations, the built-in flash on your Instax Mini 9 is invaluable. Remember that it always fires, so be mindful of reflective surfaces and maintain an appropriate distance to prevent overexposure. You’ll find the ideal balance for using the flash effectively with practice.
- Apply the rule of thirds: Create balanced and visually appealing compositions using the rule of thirds. Imagine a grid dividing your viewfinder into nine equal parts, and place your subject along these lines or at their intersections. This technique will help elevate your Instax Mini 9 photos to new heights!
- Incorporate natural frames: Add depth and focus to your photos by skillfully framing your subject with natural elements like doorways or tree branches. This creative approach will create dynamic and exciting compositions that captivate the viewer.
- Get creative with angles: Don’t hesitate to experiment with perspective when using your Instax Mini 9. Some of the best shots come from above, below, or diagonally. Step outside the box and add a unique twist to your photos.
- Master close-up shots: To capture stunning close-up shots, use the close-up lens attachment and position your camera 35-50cm away from your subject. This technique will yield crisp, beautifully detailed images that showcase the intricate features of your subject.
- Capture breathtaking landscapes: When photographing vast landscapes, maintain a distance of at least 3 meters from your subject. This ensures that the focus and sharpness extend throughout the scene, resulting in awe-inspiring photos.
- Perfect your group shots: For group photos, step back far enough to fit everyone in the frame and ensure that everyone’s faces are evenly lit. Keep a watchful eye on your viewfinder to avoid accidentally cutting anyone off so each person’s happy smile is immortalized in the final photo!
- Double exposures: Unleash your creativity by experimenting with double exposures. To do this, take a photo without ejecting the film by holding the film door button down while taking the shot. Then, take a second photo on top of the first image. The result is a unique, dreamy, and artistic combination of both prints to make your Instax Mini 9 photos stand out!
- Playing with filters: Transform the look and feel of your photos by using filters. You can place colored cellophane or translucent materials before your camera’s lens to achieve different effects. For instance, use a blue filter for a relaxed, moody atmosphere or a warm orange filter for a nostalgic, retro vibe. Mix and match filters to create one-of-a-kind Instax Mini 9 photos.
- Customizing your photos with stickers and markers: Make your Instax Mini 9 photos personal by adding your artistic touch. Use stickers, markers, or washi tape to decorate and customize your photos. Write heartfelt messages, draw cute doodles, or create unique borders to add flair and personality to your instant memories. This is a fun and easy way to make your Instax Mini 9 photos uniquely yours!
Caring for Your Instax Mini 9


Cleaning And Maintenance
- Keep your Instax Mini 9 in tip-top shape by regularly cleaning and maintaining it.
- Gently wipe the lens with a soft, lint-free cloth to remove dust and fingerprints.
- Use a slightly damp cloth for the camera body to clean any dirt or grime.
- Avoid harsh chemicals or abrasive materials that could damage the camera’s surface.
Storing Your Camera And Film
Proper storage is essential for the longevity of your Instax Mini 9 and film. Store your camera and film in a cool, dry place away from direct sunlight or heat sources.
When transporting your camera, use a protective case to prevent damage from bumps and scratches.
As for the film, please keep it in its original packaging until you’re ready to use it, and always load it into the camera away from direct sunlight to avoid exposure.
Troubleshooting Common Instax Mini 9 Issues
I’ve provided a summary of some of the key issues that you may encounter with your Instax Mini 9. If these don’t work then please refer to my detailed Instax Mini 9 Not Working guide.

Here are a few tips to address some common Instax Mini 9 issues:
- Blank or overexposed photos: If your photos come out blank or overexposed, adjust your camera’s brightness setting accordingly. Also, ensure you’re using the flash and keeping an appropriate distance from your subject.
- Blurred or out-of-focus images: To prevent blurry photos, hold the camera steady and maintain the correct focus distance for your chosen subject.
- Film jam: Don’t force the film out of the camera during a film jam. Instead, turn the camera off, open the film door, and gently remove the jammed film, not touching the film’s surface.
- Battery issues: Check the batteries if your camera isn’t turning on or functioning properly. Ensure they’re inserted correctly, and replace them with fresh ones if needed.
- Instax Mini 9 reset: I have found on a number of occasions that simply resetting my Mini 9 has resolved whatever issue I had with my camera.
Instax Mini 9 FAQs
How to Turn Off Flash on Instax Mini 9?
Unfortunately, the Instax Mini 9’s flash cannot be turned off; it automatically fires with every shot. To reduce the impact of the flash, try shooting in well-lit environments or use filters to modify the flash effect.
Alternatively, you can partially cover the flash with your hand or translucent material, but be cautious not to block the lens.
How to Use Instax Mini 9?
First, load the film into the Instax Mini 9, and turn the camera on by pressing the button next to the lens. Adjust the brightness setting by rotating the dial around the lens to match the ambient lighting.
Frame your subject in the viewfinder, press the shutter button, and your photo will be ejected from the top of the camera. Always give the photo time to develop before touching the image surface.
How to Turn Off Instax Mini 9?


Press the button next to the lens to turn off your Instax Mini 9 again. The lens will retract, and the camera will power down, conserving battery life. Store your camera in a cool, dry place to prolong its lifespan.
How to Take a Mirror Selfie with Instax Mini 9?
To take a mirror selfie with your Instax Mini 9, add the selfie clip on then:
1. Stand before a mirror and hold the camera at arm’s length with the lens pointing at the mirror.
2. Frame yourself in the viewfinder, ensure the flash isn’t obstructed, and press the shutter button.
3. Be mindful of the distance between you and the camera to provide a well-focused shot.
How to Turn On Flash on Instax Mini 9?


The flash on the Instax Mini 9 is always on by default and will automatically fire with every shot. There’s no need to turn it on manually.
Ensure the flash is not obstructed or covered when taking photos; it will work as intended.
Can You Set a Timer on Instax Mini 9?


Unfortunately, the Instax Mini 9 does not have a built-in timer function. If you want to take a group shot or a self-portrait, you must ask someone to take the photo or use a mirror to capture a selfie.
Some other Instax models, such as the Instax Mini 70 or Instax Mini 90, include a self-timer feature for added convenience.
Instax Mini 9 Tips: My Verdict
We’ve journeyed together through the beautiful world of the Instax Mini 9, discovering its features and settings, mastering lighting and composition techniques, and unleashing our creativity. We also learned to properly care for our camera to ensure it stays in top shape.
Now it’s your turn to take the reins and explore the exciting possibilities of instant photography!
Remember, practice makes perfect, so don’t be afraid to experiment and make mistakes. Embrace your creativity, find your unique style, and most importantly, have a blast capturing those magical moments that will bring joy for years to come!
Read next: Instax Mini 11 vs 9: The 5 Key Differences Between Instax Mini 9 and 11